


This article shows you how to build a custom lineup: a lineup you design yourself, with the people, columns, and order you choose. It walks through one example from start to finish, then gives the settings for other common situations.
It is written for supervisors and admins who can edit lineups. If you are new to Lineups, read How Lineups work first.
Prerequisites
- You are a site administrator, or you have the Lineups Editing permission.
Before you begin
- A Grid lineup always has one table per group. A custom lineup has whatever tables you add, and each table can pull from any groups.
- A new table starts with everyone for the day: people working, people on a regular day off (gray rows), and people on time off (pink rows). You use filters to narrow it down.
- The filter you will use most is Shift Type. Its choices are Regular, Extra, Supporting, On Call, Time Off, and Regular Day Off.
Important: A custom lineup is private. Only the person who built it sees it under Custom. There is no way to share a custom lineup with other users yet. To change what everyone sees, edit a Grid lineup instead.
Steps
This example builds Working Today: one list of everyone on duty, across every group.
Part 1: Start a new lineup
- Click Lineups in the menu at the top of the page.
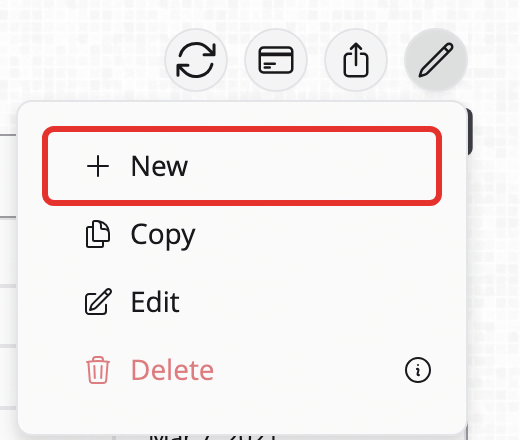
- Click the Edit button (the pencil) at the top right, then click New.
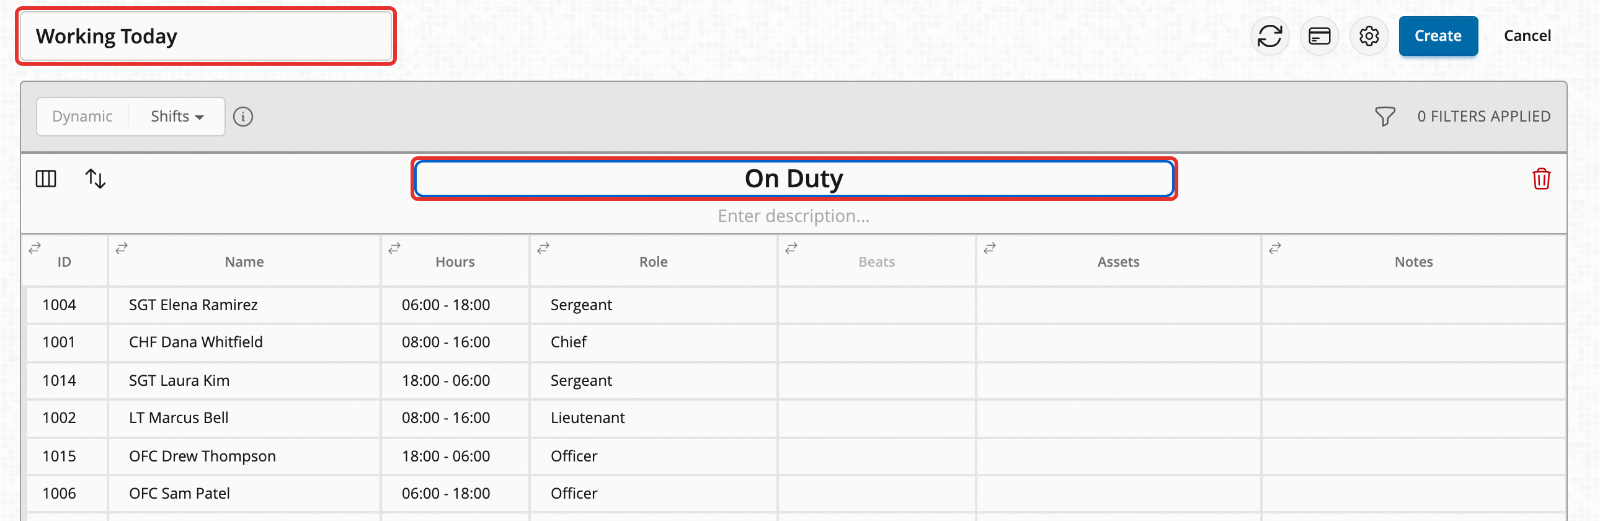
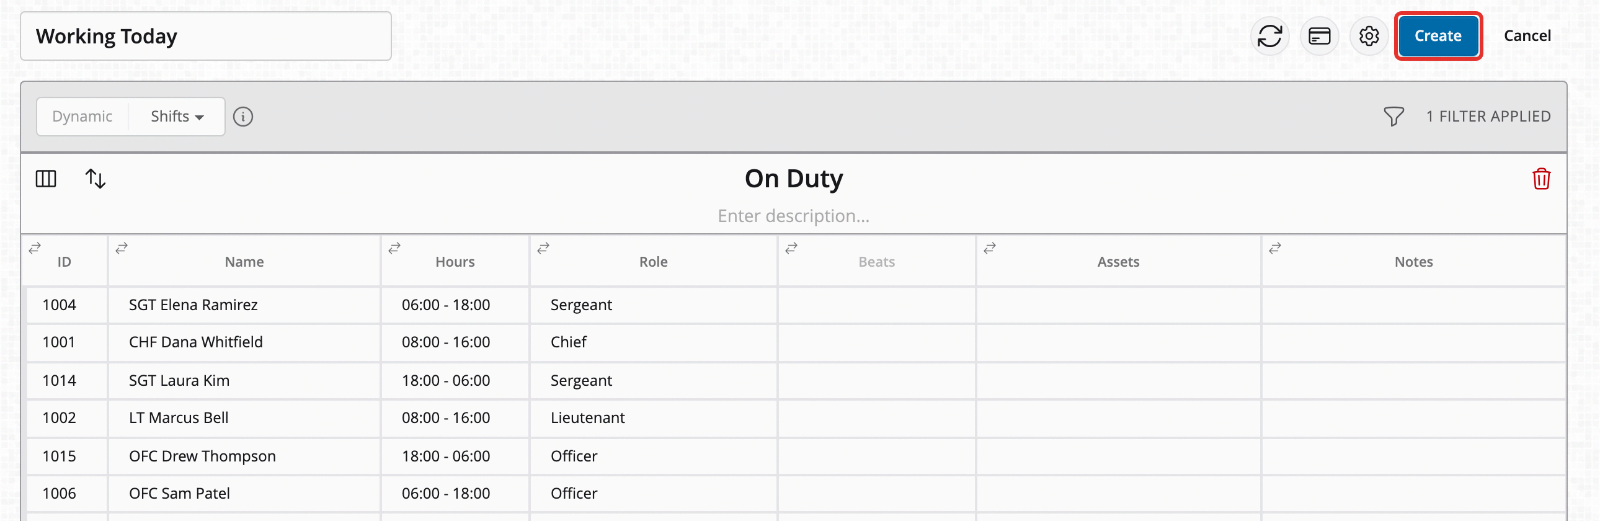
- Type a name in Name This Lineup, for example Working Today.
- Type a name for the table in Enter table name, for example On Duty.
Part 2: Filter the table to the people you want
- Click 0 Filters Applied at the right end of the table's gray bar.
- Click Add Filter.
- Click the first box and choose Shift Type. You can type to search the list.
- Click the second box and choose Is Any Of.
- Click the third box and click each kind of shift you want. For everyone on duty, pick Extra, Regular, Supporting, and On Call. Leave Time Off and Regular Day Off unpicked.
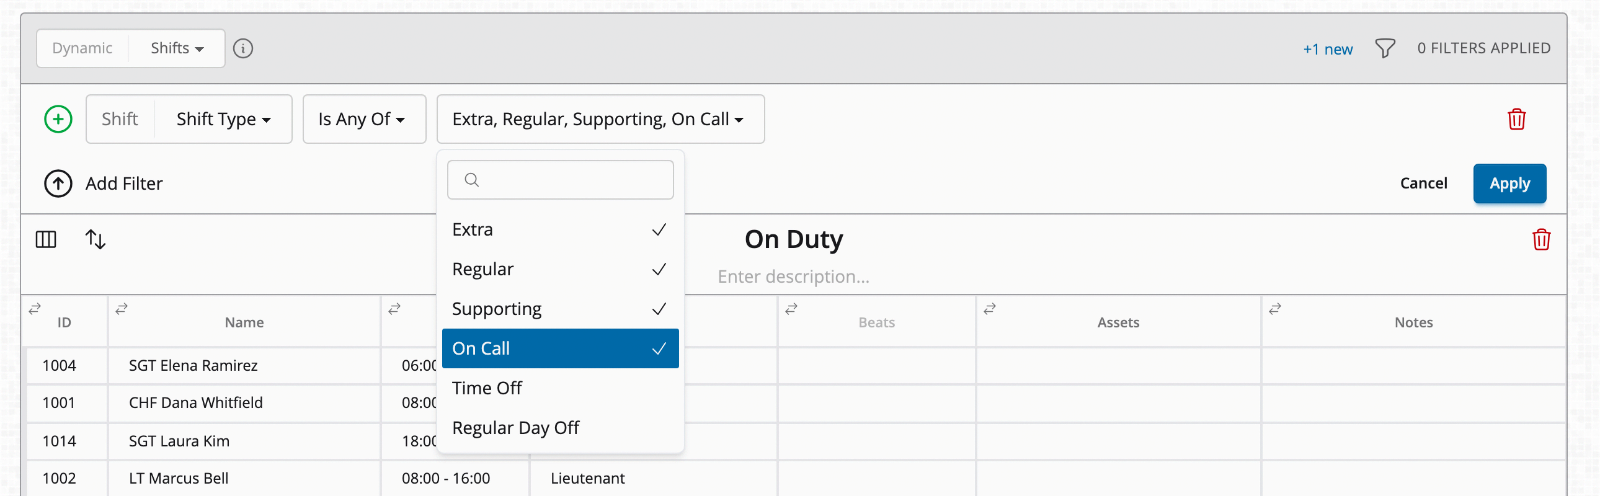
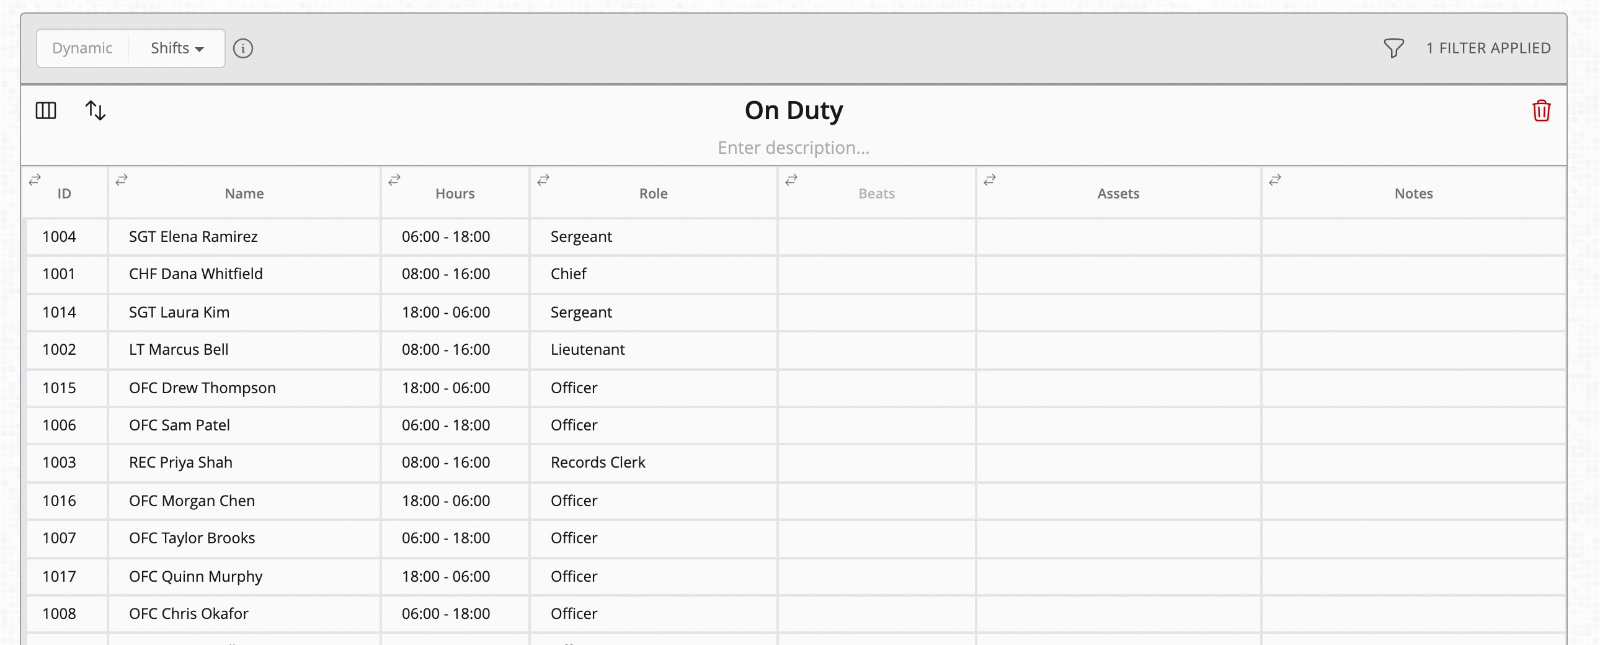
- Click Apply. The table now lists only people who are working.
Part 3: Set the order
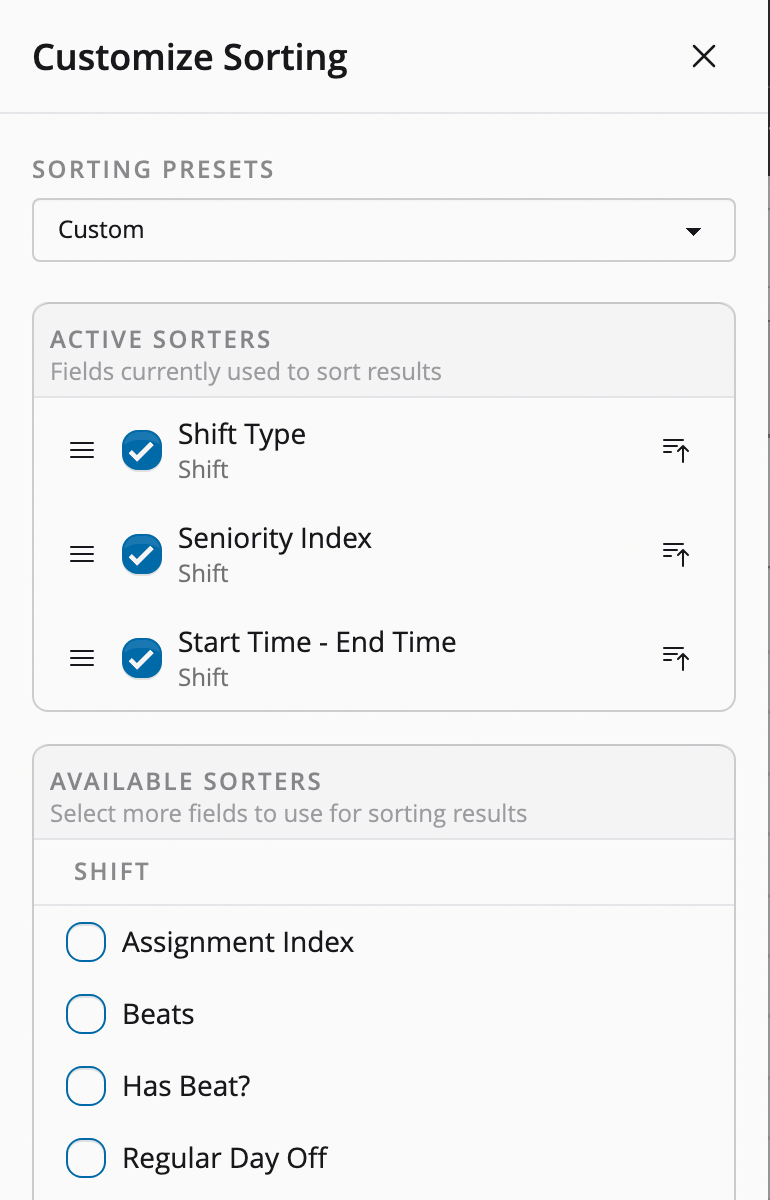
- Click the sorting button (the up-and-down arrows) at the top left of the table.
- Under Available Sorters, check the field to sort by, for example Start Time - End Time. It is added to the bottom of Active Sorters.
- The table sorts by the top sorter first. To sort by start time first, drag Start Time - End Time to the top, or uncheck the sorters above it.
- Close the panel.
Part 4: Choose the columns
Click the columns button (the first button at the top left of the table) to add or remove columns. The steps are in How to change a lineup's columns, sorting, and filters.
Part 5: Save the lineup
- Click Create at the top right.
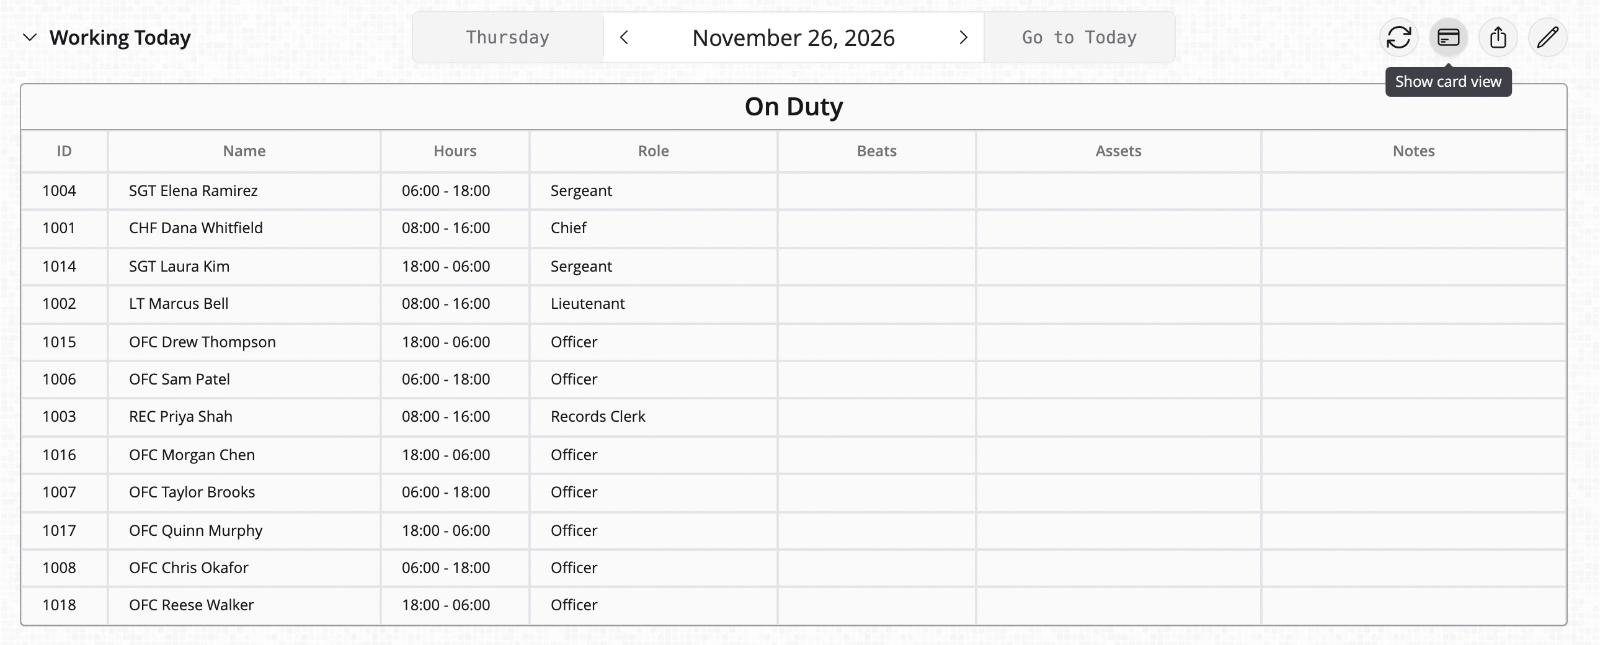
The lineup opens, ready to use. Change the day and it shows who is working that day.
More examples
Each of these is built the same way as Working Today. Only the name, the filters, and the columns change. Every filter below uses Is Any Of in the second box.
Example 1: Who is off today
- Filter: Shift Type, Time Off.
- Columns: add Description to show the type of leave. In this example Beats and Assets were removed to make room.

Example 2: On-call page
- Filter: Shift Type, On Call.
- Columns: add Cell Phone Number so the list can be used to call people. The column fills in for anyone who has a phone number on their profile.

Example 3: Extra shifts today
- Filter: Shift Type, Extra.
- An extra shift nobody has claimed yet shows as OPEN EXTRA SHIFT.

Example 4: Several groups in one list
- First filter: Group, then pick each group you want, for example A Nights and B Nights.
- Second filter: click Add Filter again, then Shift Type, with Regular, Extra, Supporting, and On Call.
- Both filters apply together, so the list shows people in those groups who are working.
Example 5: Several lists on one page
- Build the first table as usual.
- Click Add Table at the bottom of the page.
- Leave Copy Existing Table on Start from Scratch and Table Type on Shifts, then click Create. To reuse the columns and filters of a table you already built, pick that table under Copy Existing Table.
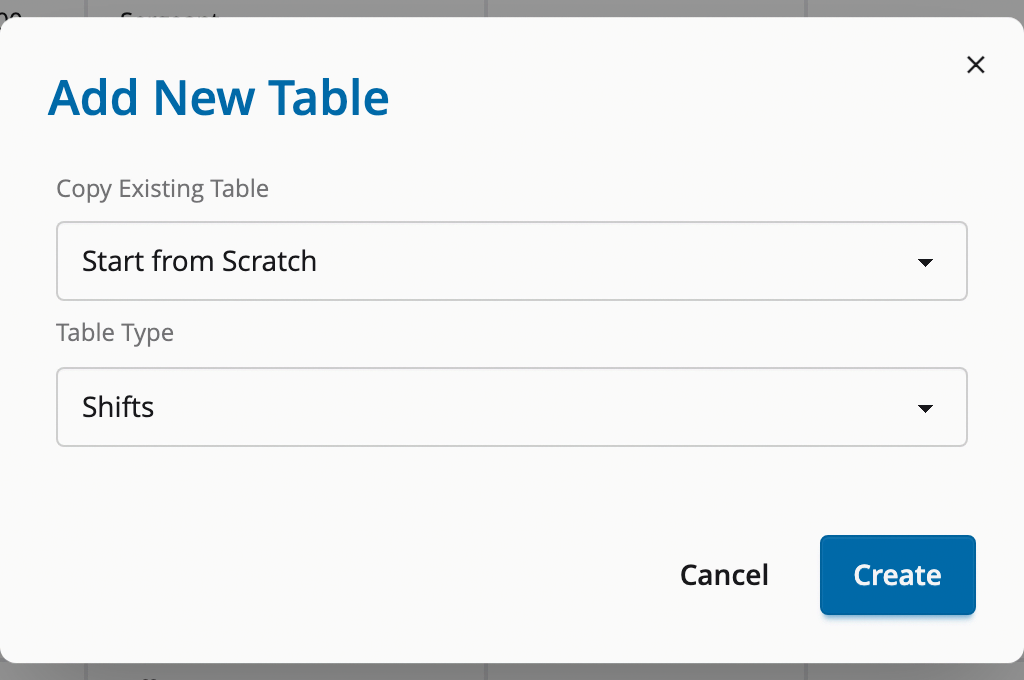
- Name the new table and give it its own filter. Repeat for each list.
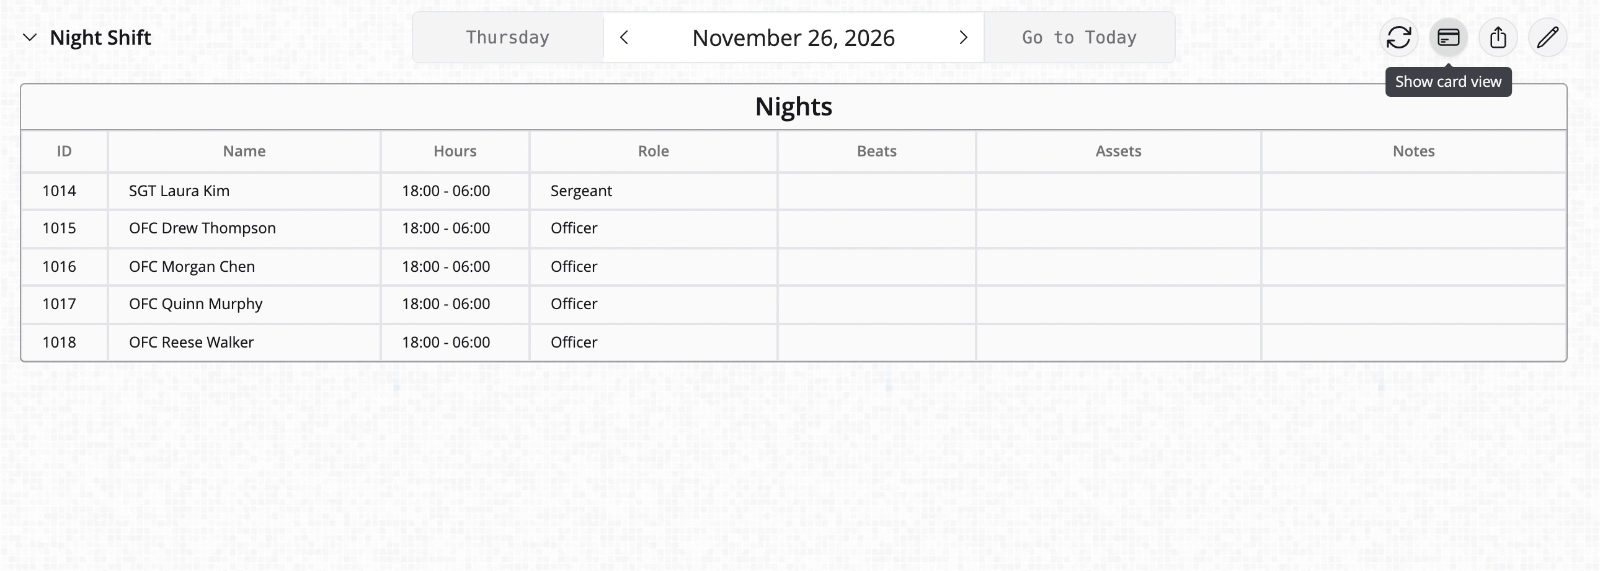
This example has three tables: On Duty (Shift Type: Regular, Extra, Supporting), On Call (Shift Type: On Call), and Off Today (Shift Type: Time Off).
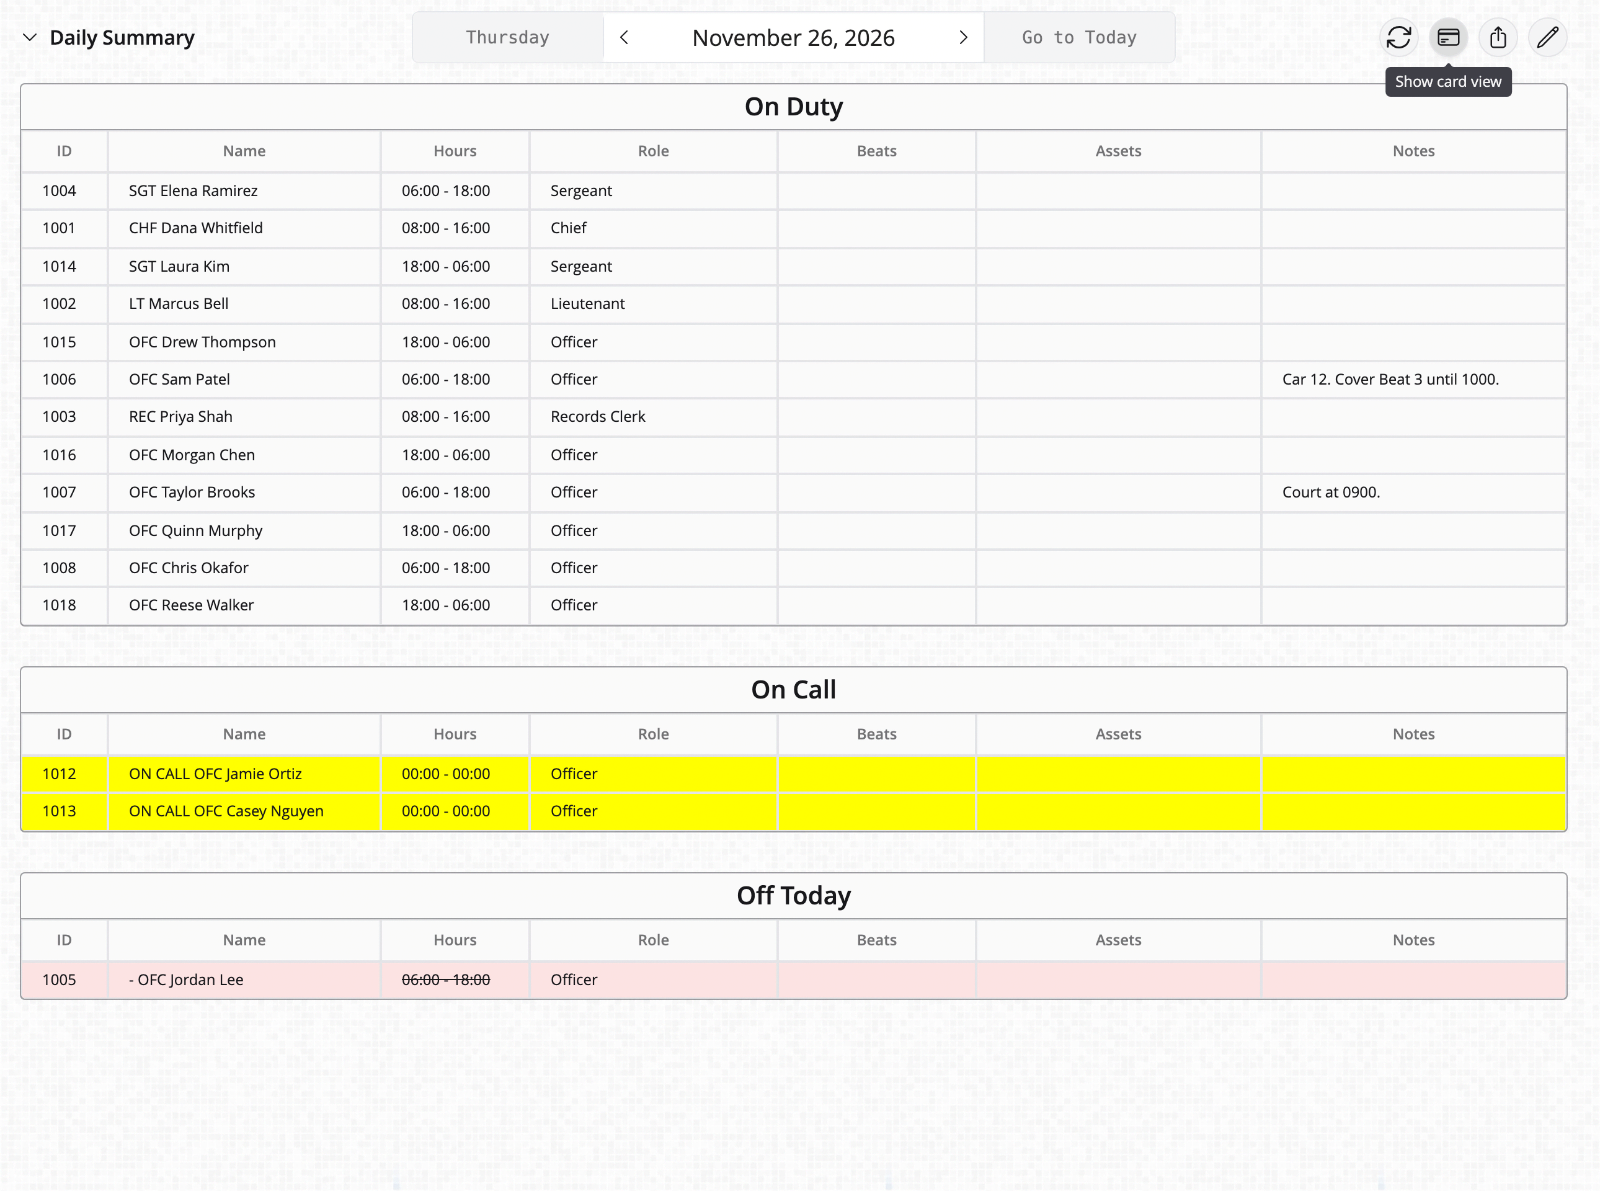
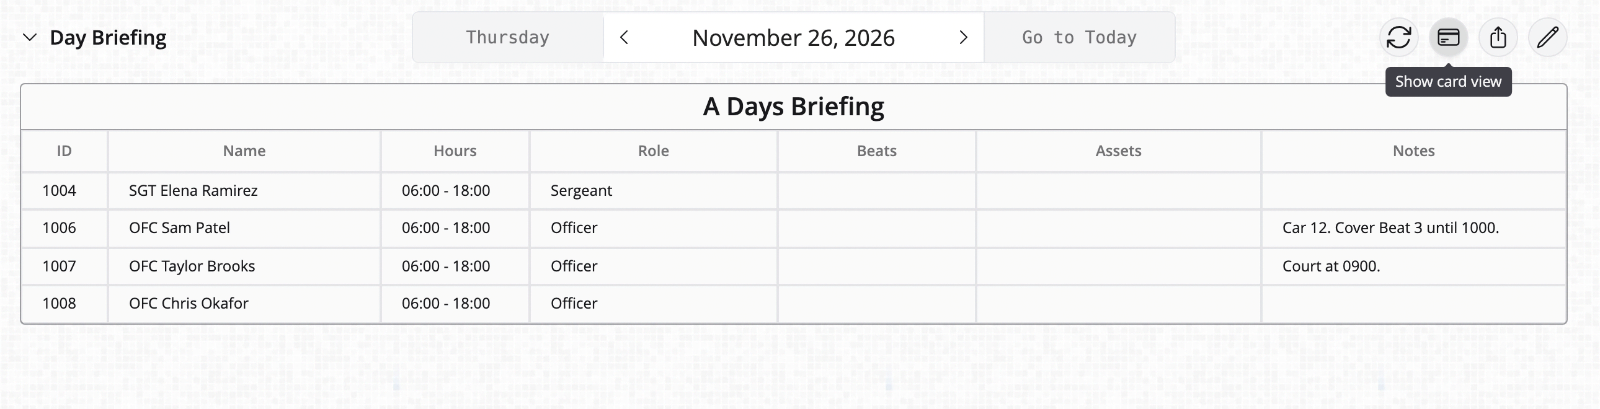
Example 6: Briefing sheet for one group
- First filter: Group, then the group, for example A Days.
- Second filter: Shift Type, with Regular, Extra, Supporting, and On Call.
- Columns: keep Beats, Assets, and Notes, so assignments, equipment, and shift notes show for the briefing.
Confirm it worked
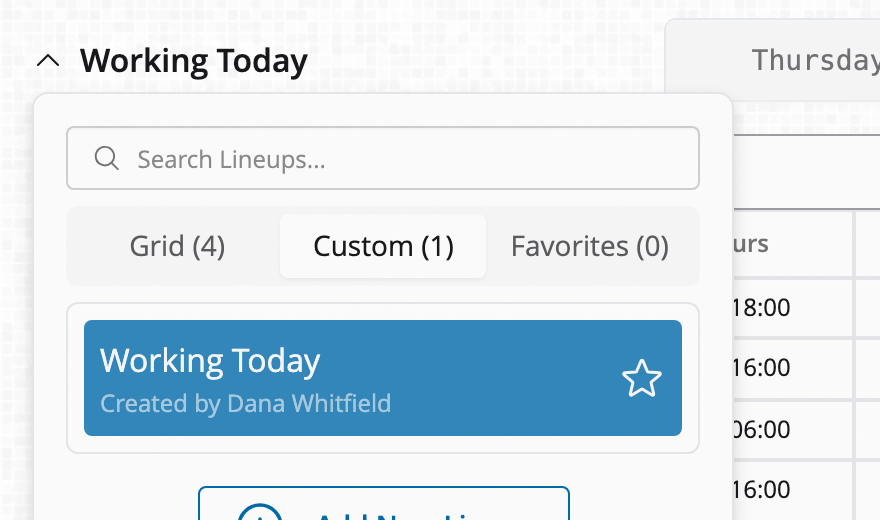
- Click the lineup's name at the top left, then click Custom. Your lineup is listed, with your name under it.
- Change the day. The list changes to the people who match your filters on that day.
Troubleshooting
- Other people can't see your lineup: custom lineups are private to the person who built them, and they cannot be shared yet. Each person who needs it can build their own, or you can export it and send them the file.
- The table shows gray RDO rows or pink time off rows you don't want: add the Shift Type filter and leave Regular Day Off and Time Off unpicked.
- The sort did not change the order: a new sorter is added below the ones already there. Move it to the top or uncheck the others.
- The table is empty: nobody matches the filters on that day. Try another day, or remove a filter.
- You want only people working at a certain hour: lineups cannot filter by time of day. Sort by Start Time - End Time so people are grouped by when they start.
FAQ
Can I start from an existing lineup?
Yes. Open the lineup, click the pencil, and click Copy. Then change the copy.
Can I change a custom lineup later?
Yes. Open it, click the pencil, and click Edit.
How do I delete one?
Open it, click the pencil, and click Delete.

