
 1427
1427
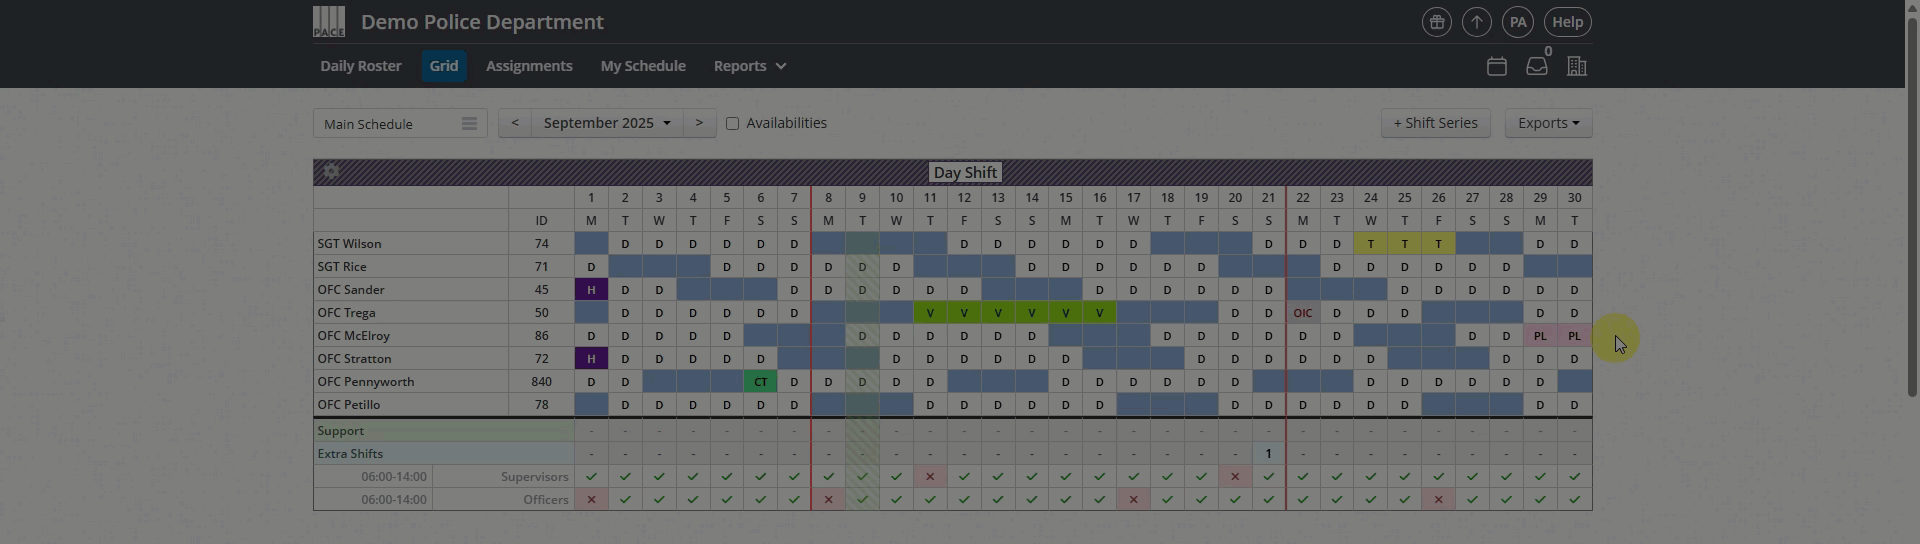
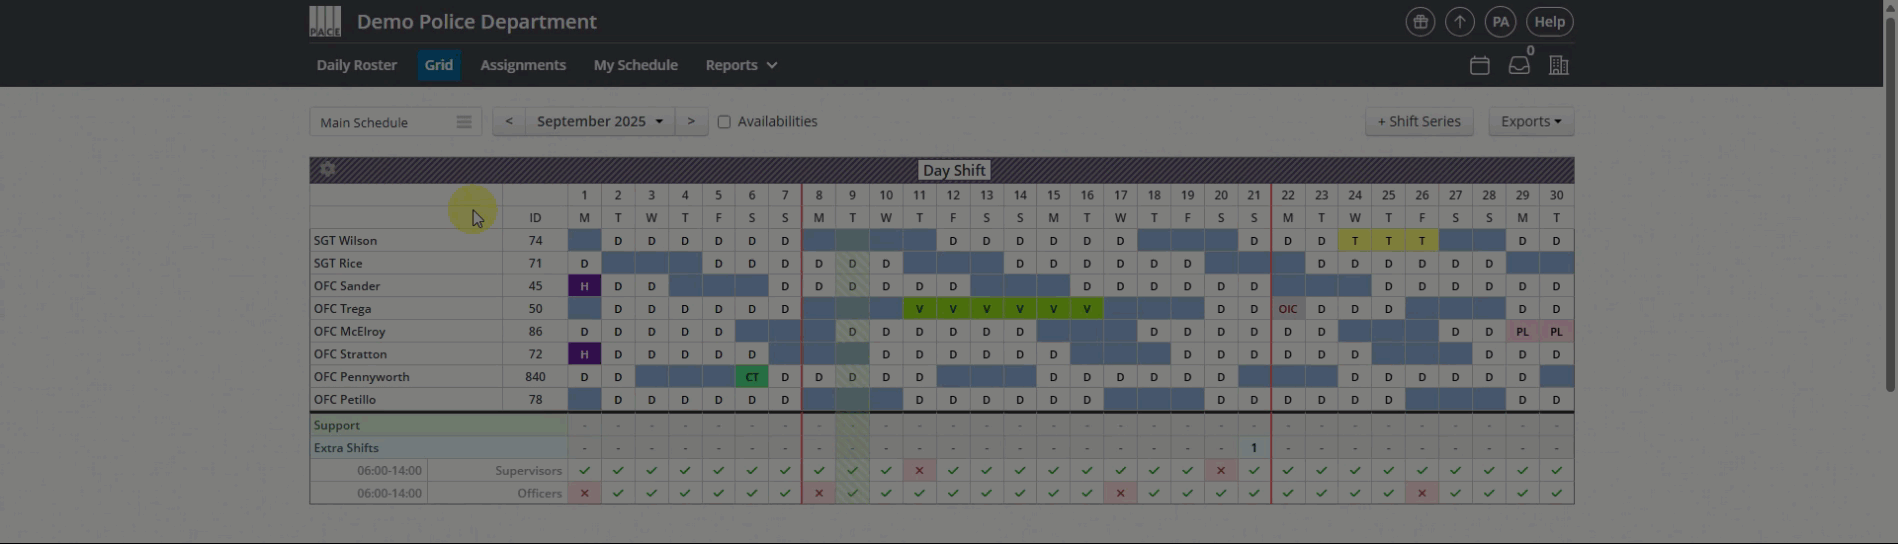
Schedule Views let you create multiple “views” of the Grid and Daily Shifts, each showing only a selected set of Groups. This makes it easy to focus on certain teams or divisions without altering the master schedule.
Steps
1. Open Schedule Views
-
Go to Admin Panel > Groups & Schedules > Schedule Views.
2. Add or Edit a Schedule View
1. On the Schedule Views page, you’ll see a list of existing views (or none if this is your first time).
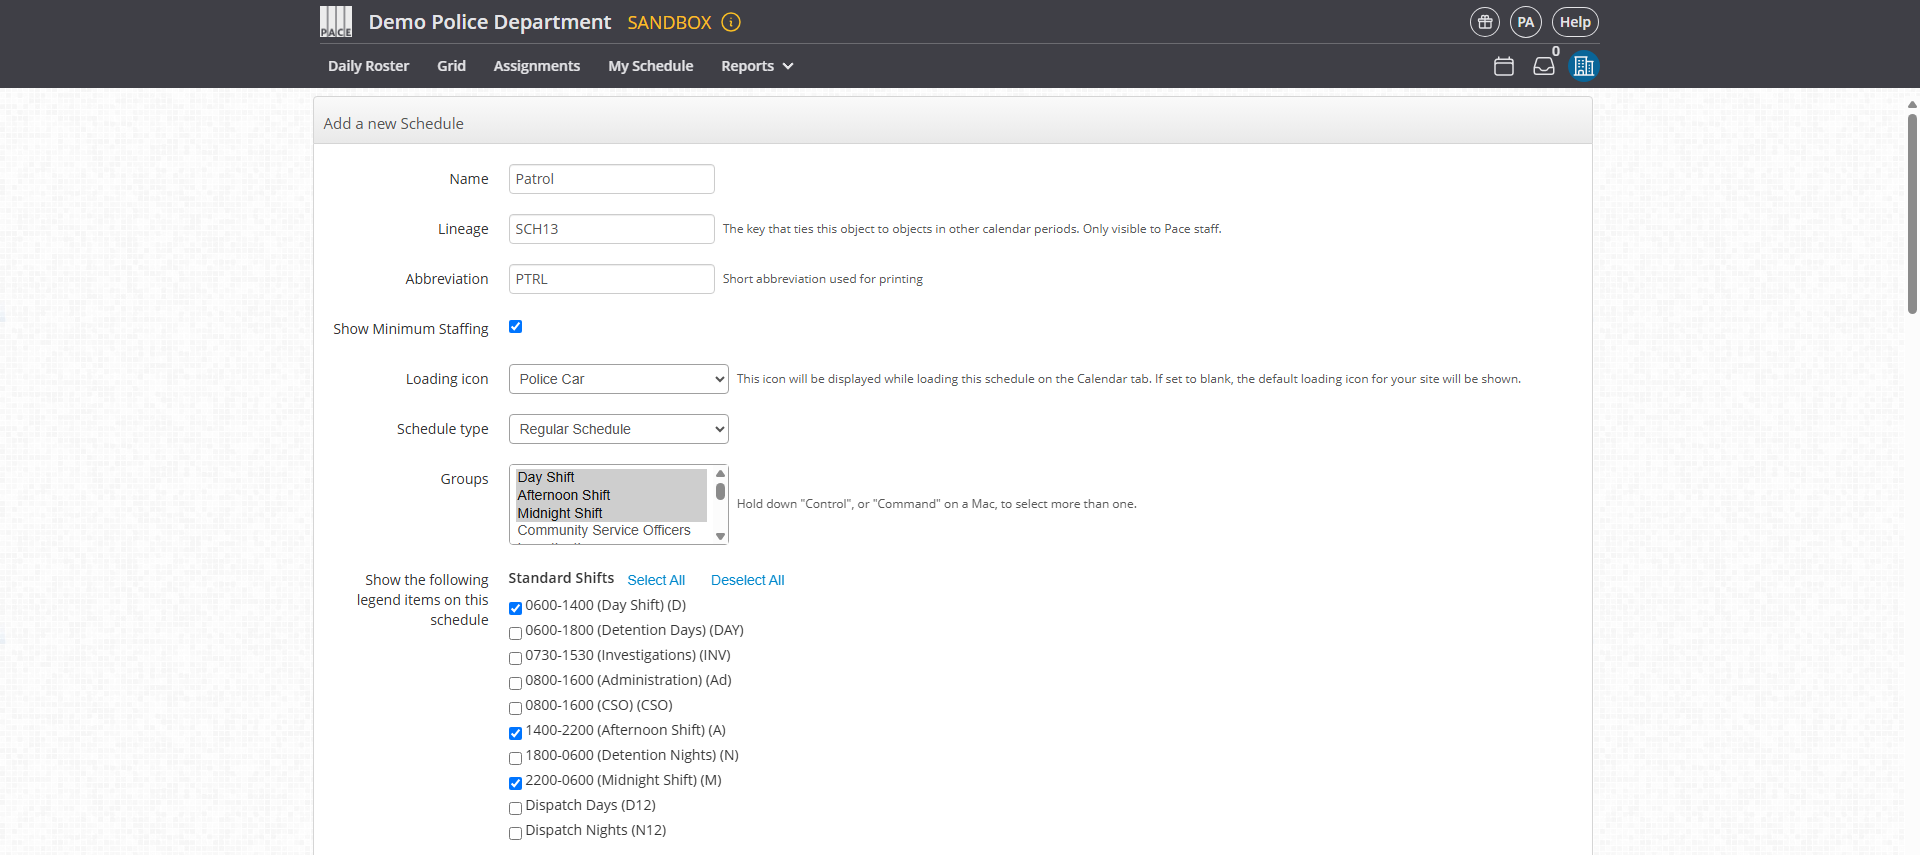
2. To create a new view, click + Add Schedule (blue button).

3. Fill out the form:
-
Name: Enter a full name of what you would like this schedule view to be referred to as.
-
Abbreviation: Choose a short abbreviation
-
Show Minimum Staffing: Check this box if you want Min Staffing rows to display. (Note: The Groups in this view must also have Min Staffing rules configured.)
-
Loading Icon: Pick the icon you would like that appears when loading.
-
Schedule type: Is it a regular schedule or an on call schedule view?
-
Groups: Select the Groups to include in this view.
-
Legend Items: Choose which legend items should appear. Unchecked items are hidden from the legend, dropdowns, and keyboard shortcuts.
-
Note: If a hidden item is used in another view, it will temporarily appear in this view until removed from the schedule.
-
4. Scroll to the bottom and click Save.
3. Access Schedule Views
5. Once created, a Schedule View dropdown will appear on both the Grid and Daily Shifts pages.
6. Use the dropdown to switch between views at any time.
Helpful Tips
-
Schedule Views are calendar period specific. Select the correct calendar period in the top-right before making changes.
-
Use descriptive names (e.g., “Patrol Only” or “Admin Coverage”) to make it clear what each view represents.
-
You can edit or remove existing Schedule Views at any time from the Schedule Views page.

